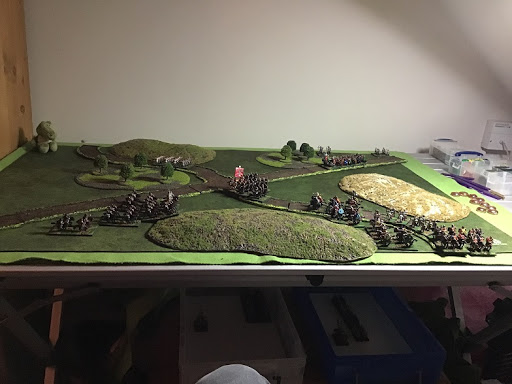
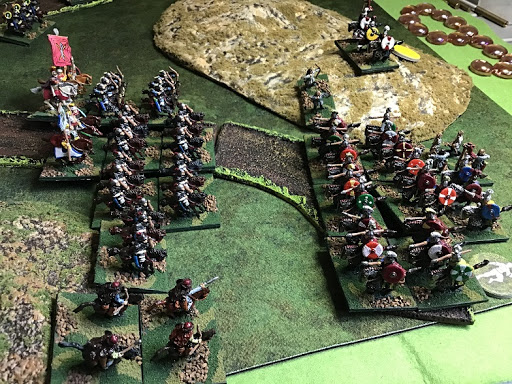
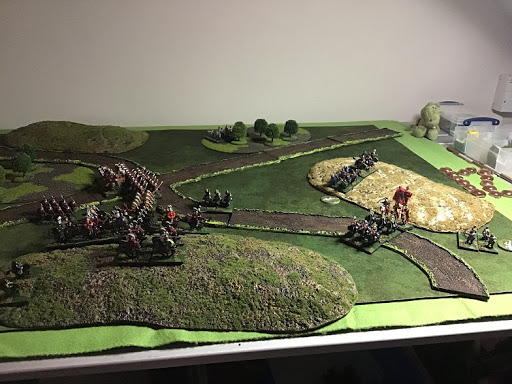
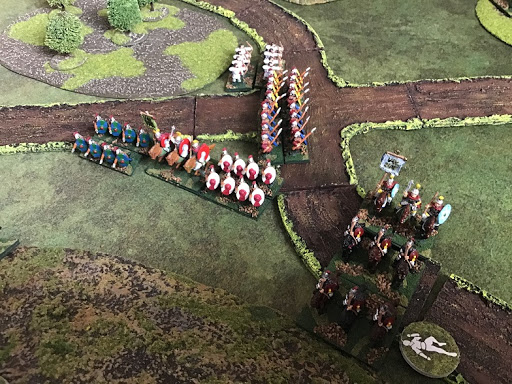
Scenario background, order of battle, and deployment details are as described in previous posts.
Battle report
Turns 1-2
The Byzantine Boukellarioi plus accompanying foot Archers are the first to arrive at the scene, on the NW road, and waste no time pushing forward to and beyond the crossroads looking for the enemy.
Then another Byzantine and two Goth commands arrive together.
The Goth cavalry plus archer command arrive on the SE road and rushes forward.
The Byzantine Kavallarioi plus Hun command arrives on the SW road and rushes forward, coming up in support of their C-in-C and the Boukellarioi, whilst detaching the Huns (in skirmish order) to occupy the S hill. The Goths were not counting on enemy getting quite so close to them, quite so quickly!
The Goth spearmen plus archers command arrives on the NE road and lackadaisically move forward (no cards for a double move!) . The archers are detached to occupy the wood, in line with the cautious frame of mind of their commander.
Turn 3
The Byzantine Bukellarioi have a choice to make. They decide to go all gung-ho – “let’s try and punish the Gothic cavalry before they can get organised and supported”, is the thinking. The Kavallarioi deploy off the road and aim for the hill. The archers continue along the road – they may get the job of slowing the enemy spearmen.
The Goth spearmen’s commander, as it happens, seems to have got a bollocking from higher up, and (with very good cards this time!) gets the spearmen double moving along the road, and one unit of archers into the woods.
The Goth cavalry do not advance further, but deploy in line. Their archers move up a bit to make space for the next command to arrive.
But: not enough space! One unit of cavalry arrives and heads left towards the hill. The next two just make it onto the table. The skirmishers do not make it on yet. This will turn out to be a significant, ongoing problem.
Turn 4
The logjam in the SE means that the Goth cavalry are looking like they may be overmatched, as the Byzantines are successfully deployed 6-wide. (Albeit the line is still a little ragged. Only one unit is in shooting range now, but that will change soon enough.)
The Byzantine archers double move forward, nervously. The Goth spearmen are still a long way off but...
The Goth spearmen continue consuming Red Bull and dash up the road at high speed! Deploying will take a little time, but they are starting to be an actual rather than potential threat.
Goth archers in the SE move forward further, allowing space for one cavalry unit from the following command to move along the road. The other cavalry and the skirmishers make no further progress this turn.
The logjam will get worse soon, as the final Goth command arrives next turn along the SE road!
Turn 5
Shooting inflicts a wound on the Goth cavalry on the road, but nothing on the Goth spearmen (who choose to risk not having shield cover, in order not to reduce their movement).
Byzantine archers move upon the road NE off the crossroads, restricting further advance by the Goth spearmen. One unit of spearmen gets up in their face, ready to fight next turn. But a lack of good cards prevents the following spearmen from deploying off the road in order to come up on the flanks of their leader. Instead the Goth archers continue to move up along the N edge of the table, looking rather irrelevant for the moment.
On the S side of the map, opposing lines continue to coalesce.
The Byzantines had thought about charging, but the units either side of the road Boukellarioi were out of shooting range and, even more crucially, just out of charge range. So the intention is to get as much shooting volume as possible in place for next turn, and retain the option to charge or evade.
The Goth lancers had thought about charging but didn’t want to put themselves entirely into a trap before support could come up. And with only a single file the effect of the devastating charger characteristic is somewhat devalued. So their commander holds them. Another factor counting against the Goths in a confused, messy confrontation like this has developed into!
The road is now clear for more troops to enter, but there are no cards to bring on the skirmishers, so the final Goth command does not make it on either this turn. (There is not a lot of space for them at the moment to think about achieving anything useful even if they did, unless they take a wide loop to the north.)
Turn 6
In the N, Goth spearmen charge the archers blocking the road. Another no-brainer.
The shooting has no effect and the spearmen crash in, killing a base of archers but suffering a wound in return.
In the S, the Byzantines think long and hard about charging, but decide not to (mainly because it seemed a shame to expend so many nice shiny yellow and red cards, and there is a temptation to hope they will be allowed to continue shooting unmolested).. The Goths do not want to hang around being shot at and so all 4 frontline cavalry units charge. Even the single-base one, which is a bit bold, or perhaps reckless. Especially since it is against superiors and having lost the second rank does not get the devastating chargers effect. Note to self – check and double-check the factors before making decisions!
The Byzantines decide to stand, and also shoot – perhaps not a good decision...I had temporarily forgotten the +1 for charging cavalry who shoot, perhaps the Byzantines should have charged after all and gained the benefit of shoot and charge! Or evaded? I haven’t quite got the feel for these decisions. It is easier being a hairy Goth!
The shooting is reasonably effective here, helped by the overlapping Boukellarioi and Hun units. Two wounds caused, but unfortunately not on the single base unit.
The impact starts well for the Goths – killing a base on the S-most Byzantine Kavallarioi, and creating a nice +3 matchup on the next file due to shatter taking effect. Here the Byzantines take a wound but, importantly, stop the shatter propagating. It is bloodless on the third file. And then the Goth single-base unit at the N-end of the line causes a wound, but also breaks, not entirely surprisingly. This kicks off a chain reaction which, jumping back and forth, carries all 3 of the other cavalry units away with it.
The S-most Gothic general is stunned and loses his cards. The other is wounded. Neither of these developments help the command-and-control bottleneck in the SE corner!
As a wise Goth once said – “whoops!”
The Goths still cannot bring on the skirmishers – their commander lost his cards due to the stun. And that continues to hold up the final command (I need to think of some better rules for getting onto the table!).
Goth archers in the N join up in the wood. Gothic archers in the middle turn and present some sort of front against the encroaching Boukellarioi.
Most of the Byzantine cavalry pursued. The overlapping Huns also move up. The overlapping Boukellarioi move up a bit but wheel to face the N-most Gothic archers.
The Byzantine archers on the NW road turn right and move towards the S. They may still have a part ot play in getting in the way of the spearmen; or maybe they will go and hole up in the woods and guard the crossroads from a moderate distance.
To add insult to injury for the Goths, the Byzantine Skoutatoi command now arrives in the SW corner road and double-moves smartly along the road.
And more insult...the Byzantines are able to clear their cavalry wounds. Score so far – Goths lost 4 units of cavalry, Byzantines lost one base of Kavallarioi and one base of (frankly sacrificial) archers.
Turn 7
The Byzantine Boukellarioi charge the two units of archers more-or-less in front of them. With 2 reds and a yellow, the cost of prompting them can be borne! Both units of archers are swept away, but the cost is a wound on the way in and a wound in the +3 combat removes a Boukellarioi base. That could be costly later. The already-wounded commander is killed in the rout. He has no units left to command, anyway.
The remaining Goth cavalry to the S is not likely to last long, but should it be allowed to charge and perhaps die quicker? Bad cards make this a hard choice – hold the charge or move the skirmishers onto the table. The commander compromises – opting for a brave but likely hopeless charge, whilst he insists on staying back to guide the new arrivals. This charge doesn’t turn out to be immediately disastrous. The massed shooting it faces on the way in does nothing. It then is up in the impact (again, the charged Byzants decided to stand and shoot, accepting the minus in combat), but loses a wound to nothing. Overall though, could have been worse!
The Byzantine Skoutatoi continue to advance rapidly along the road, they might actually get ot the crossroads before the Goth spearmen.
The lagging Byzantine archers turn around and do seek to skulk in the woods, ready to co-operate with the Skoutatoi presently.
Goth archers continue to move through the N woods, a long way from the action.
Goth skirmishers come onto the table with a double move, which does allow room for the final command to get on as well. Although facing the wrong way so they still have some work to do in order to become relevant.
The single-base Byzantine Kavallarioi moves up into an overlap position, ideal in its current fragile state (thank the Goths who routed in front of it and rolled a 1 on the move distance!)
A unit of Goth spearmen move up alongside the ones fighting the archers, but can’t quite get into overlap yet.
The single-base Byzantine archers on the road continue to delay the spearmen...a bloodless round of combat.
Also bloodless is the fight of the Goth cavalry on the S hill, despite being overlapped on both sides.
Turn 8
The single-base Byzantine Kavallarioi charges into the flank of the engaged Goth cavalry next to them. This causes immediate destruction, and the resulting tests cause a wound and remove a base from the skirmishers on the road behind. The Kavallarioi decide to take advantage of the option to “pursue”, putting them within shooting range of the left-most Goth noble cavalry and cramping their freedom of action.
Other Byzantine Kavallarioi and Huns edge forward, some get into shooting range.
The Goth skirmishers on the road move forward nervously – into shooting range.
The single-base Boukellarioi wheels left and heads towards the rear/flank of the spearmen.
The spearmen cannot respond effectively because of lack of good cards!. One unit moves into overlap to try to finish off the Byzantine archers blocking on the road. One unit of Goth archers continues to trundle through the woods.
The non-engaged Byzantine archers continue to move back into the wood behind the crossroads.
The Skoutatoi get a set of good cards and everybody double moves, with the second in the column beginning to deploy out to the right of the road.
In the melee against Byzantine archers, the original spearmen unit is galvanised by the arrival of friends in overlap and demonstrates it didn’t actually need them. Scratch the first Byzantine unit.
A wound is removed from one of the Goth skirmishers. Big fat hairy deal.
Turn 9
No charges. The Goths need to make sure they deliver a coherent charge rather than piecemeal.
Shooting causes a wound to the S-most Goth noble cavalry, and a wound to the N-most Byzantine Kavallarioi.
The Skoutatoi continue to deploy out into a line to the right of the road.
Goth noble cavalry gets into line, ready to charge.
Byzantine cavalry straightens up their line somewhat, to bring as much shooting power to bear as possible.
The Goth skirmishers are getting out of the way/pushed back.
Byzantine archers in the wood now turn around and line the front edge, covering the flank of the Skutatoi nicely. They are only just in command range of their general now – something to be careful of.
One unit of goth spearmen manages to turn and face the Boukellarioi...which then dances away just out of reach of their front and closes in on the middle spearmen unit!
The forward Goth spearmen wheel back round toward the Skoutatoi, although they also may have to beware of the Boukellarioi on their flank.
The rear Goth archers in the N wood again close up with the front archers. Are they going to come to the rescue of the spearmen?
The Byzantine Kavallarioi commander heals a wound; the card saved for this purpose could otherwise have been used to change the Huns into loose formation, or bring the single-base Kavallarioi unit up into shooting range, so the Goth skirmishers can say that have had some small impact on the battle at least.
Turn 10
The Goth nobles charge together. The Byzantines can afford to play it safe so decide to run away with the 4 units in the path. Their shooting has no effect. The unaccounted-for Boukellarioi unit is now behind the Goths’ flank, however.
The Byzantine single-base Boukellarioi charges into the flank of the middle spearmen unit, and simply obliterates it.
In a standard battle, this would be the point of army break for the Goths.
The Byzantine archers in the wood shoot at the front spearmen, and despite use of shield cover score a wound, which means a base is now removed.
That Goth spearman turns around to face the Boukellarioi, and the Byzantine archers and a unit of Skutatoi advance towards their rear. They don’t look long for this world.
There is some post-evade shuffling of positions of Byzantine Kavallarioi and Huns on the S hill, preparing for the next charge.
The single-base Goth skirmishers get in the face of the Boukellarioi behind the noble cavalry flank – by stopping them from wheeling to charge they can provide flank protection for a turn at least. The other skirmisher unit hangs back but comes forward enough to get into shooting range.
Byzantine Skoutatoi continue to deploy to the right of the road, but now angling backwards in the light of the distant threat of the Goth nobles.
The rear Goth spearman unit legs it forwards towards the E hill. They may have a chance of making it to safety.
A wound is removed from the S-most Goth noble cavalry.
At this point I’m tempted to dice to see if the Goths wish to stop pressing their attack; and if the Byzantines wish to let them do so, consolidating their hold on the objective. But I feel like playing on!
Turn 11
Byzantine Boukellarioi charge the skirmishers, both choose to skirmish rather than run away, and the single-base unit is duly overrun and destroyed.
The Goth noble cavalry charge on up and along the hill. The Huns take a slight chance and skirmish, and get away with it. The other Byzantines run. The Huns are rewarded by causing a wound. Soon the N-most Kavallarioi will run smack into some Skoutatoi, so something needs to be done about that possibility.
Byzantines decide to shoot at the back of the forward spearmen, rather than charge it. Saving the command card may turn out handy, and also I am dying to try out these “darts” things I haven’t seen since the old WRG days!
And it is indeed the darts which break the spearmen, the bows having shot first and whiffed. And the general gets fatally trampled in the rout. Nobody is in range to care, this time.
The Byzantines turn some of their units of the hill, they may need to think seriously about standing next time. One of the Skoutatoi units has got out of the way, but not the second one.
The final Goth spearmen unit is still scurrying for the apparent safety of the E hill – this time it is a unit with no commander, being controlled by a commander with no units. And after having spend two cards on this, he still has a red and removes their wound.
The S-most Goth noble cavalry is also cured of its wound. No wounds remain on the table, for the first time in quite some while.
The single-base Byzantine Boukellarioi gives up its sport of spearmen-hunting, and decides it had better start making tracks back to help out on the S side. Probably it should have been doing that all along!
Turn 12
The Goth noble cavalry charge. Two units of Kavallarioi stand, but this time don’t shoot. The Huns and the single-base Kavallarioi (which in any case was still facing away) skirmish. Hun shooting again causes a wound – these guys are hot! In the impact, the right hand Kavallarioi (facing a Goth general fighting in the front-line, since it is do-or-die time) takes a wound, but prevents shatter; and the other combat is bloodless.
Shooting causes a wound to the Goth skirmishers.
The Goth spearmen move along the lower reaches of the E hill, looking for a moment like they are thinking about threatening the rear of the Boukellarioi. But those are soon moving further out of reach.
Both Byzantine Boukellarioi units are now scrambling back to help on the hill.
Byzantine Skoutatoi are still reorganising themselves but have at least now all got out of the way. One unit moves forwards and may be in position to help in the combat shortly.
The melee goes well for the Goths. The S-most engaged Kavallarioi is broken, and in turn breaks the single-base Kavallarioi and removes a base from the Huns. The other combat is again bloodless, important as it holds the Goths in place to be hit in the flank.
Another wound was inflicted on a Goth noble cavalry unit in the process, but to cap a successful round, both of the cavalry wounds are removed at the end.
The Skoutatoi may soon have to think about turning themselves around as a matter of urgency.
Turn 13
The pursuing Goth noble cavalry have gone too far to be able to wheel and charge the flank of the remaining Kavallarioi.
The single-base Boukellarioi on the other hand are now in range of the rear corner of the still-engaged Goth nobles, and pile in. Their shooting does nothing, but the impact inflicts a wound and a skull, breaking the Goths instantly. Unfortunately they do inflict a wound in return, so the Boukellarioi although victorious, disperse to a nearby inn to toast their achievements.
Knock on effects: a wound to the remaining Byzantine Boukellarioi, and a wound to one of the Goth noble cavalry units.
Two units of Skoutatoi, one with some prodding from their commander, turn to face the threat from the hill. The Kavallarioi move forward to get out of the way, and also turn to face the hill. The Boukellarioi are still coming back.
The Goth nobles choose to keep moving to the W, seeing their chance to escape. The Byzantine Huns turn and run ahead of them.
Finis
And here I call a halt! Result – the Byzantines have achieved their objective, and a substantive win.
It was looking like a complete whalloping for most of the game, but the belated arrival and heroics in a losing cause of the Goth noble cavalry put a bit of a dent in the victory celebrations.
The mutual break of the Boukellarioi on turn 12 allowed the Goths to escape at the end. Perhaps a bit lucky for them. And enabled by the also somewhat lucky removal of a Boukellarioi in the +3 impact against the Goth bows, back in turn 7, before their first wound could have be healed at the end of that same turn...
...But of course the delayed arrival of the Goth nobles was a big plus in the fortune stakes for the Byzantines, so they can’t complain too much.
Conclusions / food for thought
Cavalry skirmishing against cavalry is tricky, if within shooting range there is a good chance of being caught. A run away move, even if it proves safe, not only takes away some of the point of what you may be trying to do (i.e. cause casualties); but also it can be hard to recover if you end up with a number of units with enemy just behind them. Thus it feels more comfortable with 1 or 2 units evading, not 5 or 6.
I also need to put a bit more thought into the question of, if you are cavalry who are going to stand and receive a charge, you should also shoot. There is also for those who have charge and shoot capability to declare a charge of their own to avoid this decision. Slightly non-intuitive perhaps.
I found out later I was wrong in allowing a unit already touching corners/sides to charge in on the flank. It probably wasn’t critical, the chances were the enemy would have died anyway, moving into side contact is still a +2 against an already overmatched unit. Another detail to properly internalise.
And oops! I also forgot that skirmishers should have broken on losing a base. That was more critical, because the provided the flank protection to the Goth noble cavalry while they were assembling for the final charge. Maybe the other skirmishers could have got there instead? I can’t quite remember. Being out-of-command may have hindered this.
The contrast in equipment and tactical styles was very noticeable in this scenario. Unlike the free-booting Byzantines, he Goths really needed to ensure they were properly deployed and mutually supporting before getting near to the enemy. This is very reminiscent of points made by one or more characters to explain their inevitable victory against much larger forces in Robert Graves’ “Count Belisarius”!
I do need better rules for coming onto table. Allow coming on within 2BW either side of road on turn of scheduled arrival, expanding out by a further 2BW each turn thereafter? Perhaps only after first sighting of enemy – before that both sides must remain in columns (or in scenarios with pre-written order of march/instructions, obeying those). And following commands should be able to pass through skirmishers who haven’t come on yet. (Include skirmishing cavalry in this, even though they are more restricted for on-table interpenetration?)
The end result does of course show the importance of getting your potential game-winners into action early. Probably that is not particularly news to anyone!


No comments:
Post a Comment